The JEDWare Agent Report provides a detailed breakdown of call activity for agents within a specified period. This report helps managers track agent performance, workload distribution, improving customer service, and ensuring a balanced distribution of calls across the team.
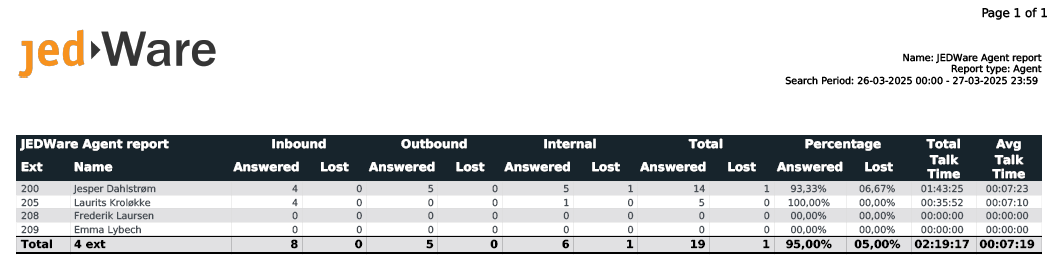
The PDF end result for a Agent Report will look similar to the one below.
The report contains:
Agent ext, Name, Answered/Lost Inbound/Outbound/Internal Calls, Total calls, Answer %, Lost %, Total/Avg. Talk Time.
How to set up a Agent Report in PDF Format.
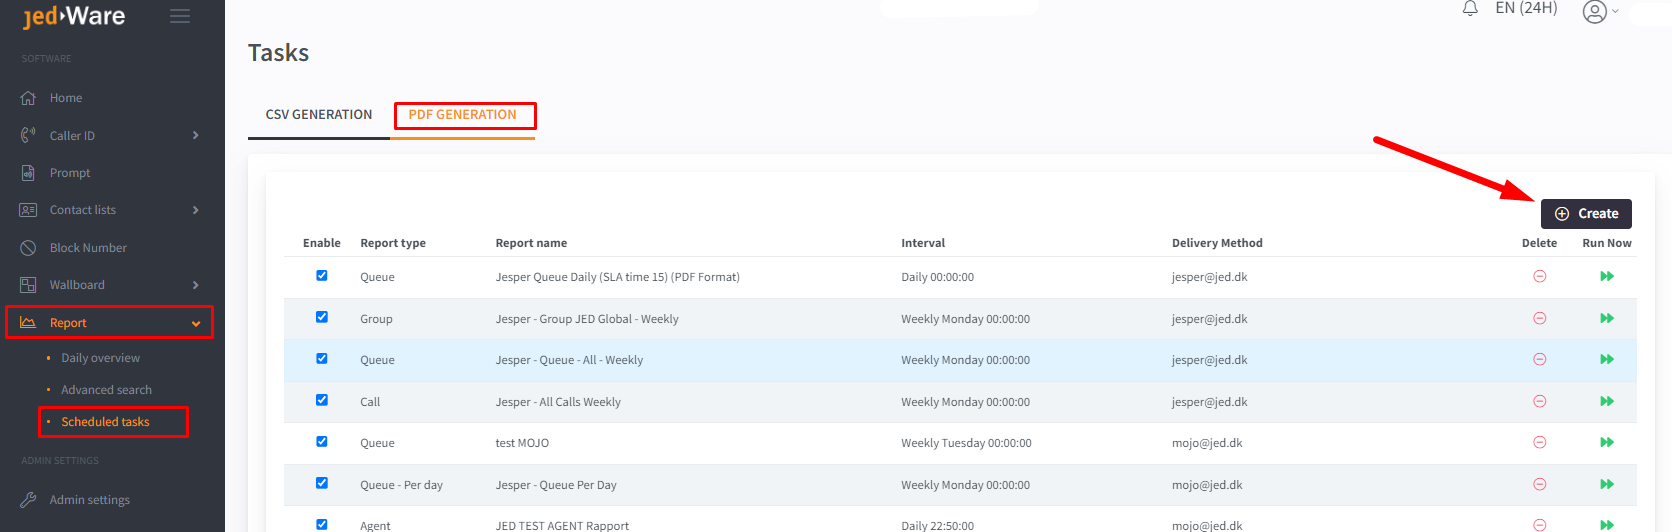
In the JEDWare left menu, click Report -> Scheduled tasks, and click on the top menu PDF GENERATION
Select the Agent report
We do offer templates for:
—-Agent—- Agent report Agent report – Outbound Agent report – Total Group report Group report – Total
—-Status—- Agent Status Agent Status Group Agent Status Detailed Agent Status Detailed Group Queue – Availability
—-Queue—- Queue report Queue – Per day Queue – Inbound Activity Ring Group
—-Miscellaneous—- All Calls report Trunk
Click OK, and we are ready to set up the Agent report
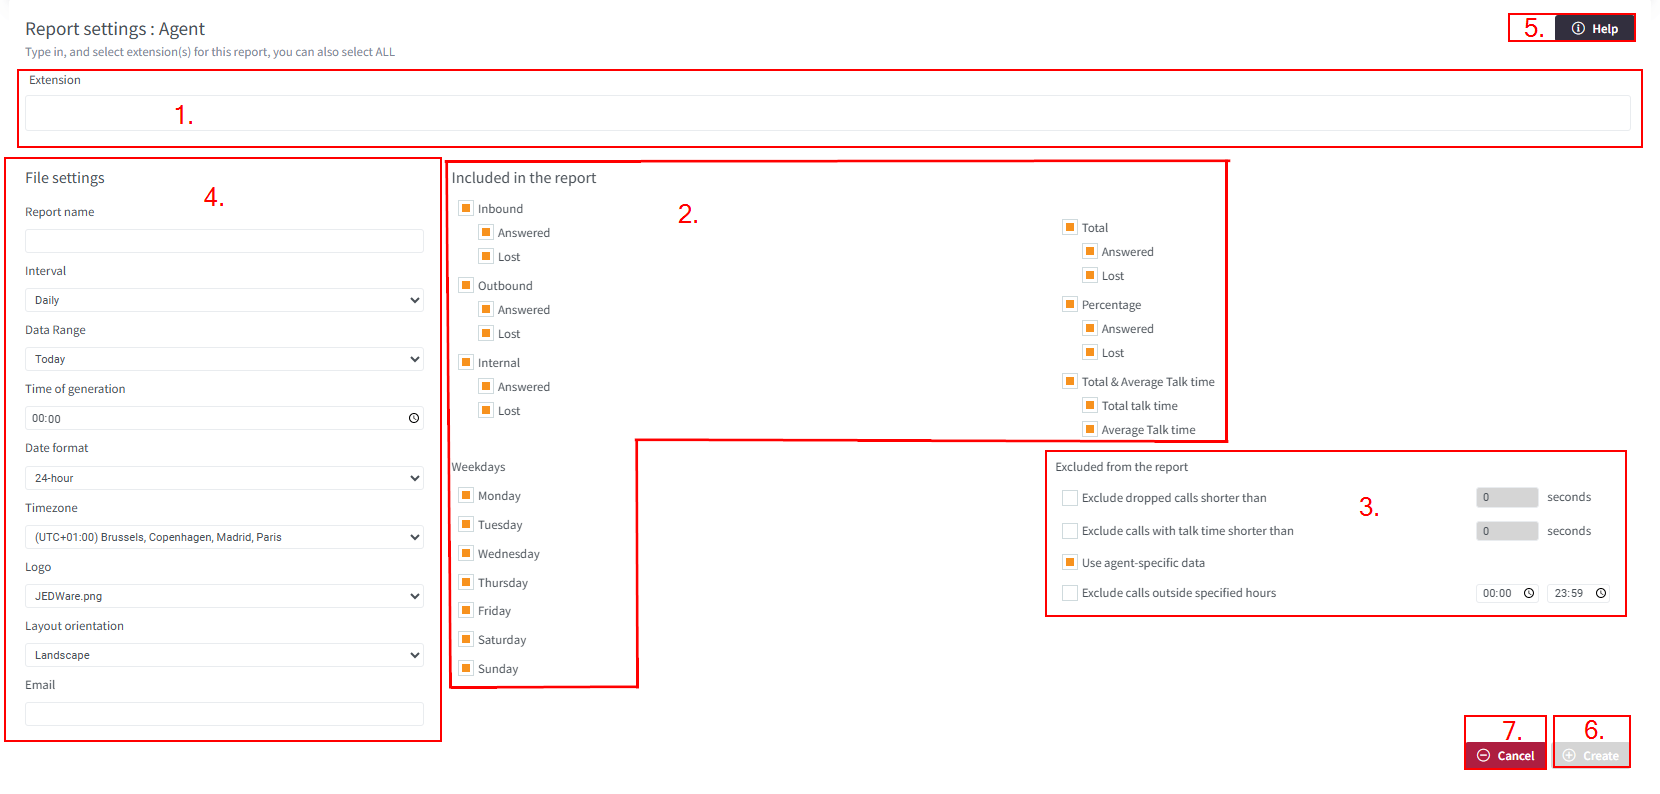
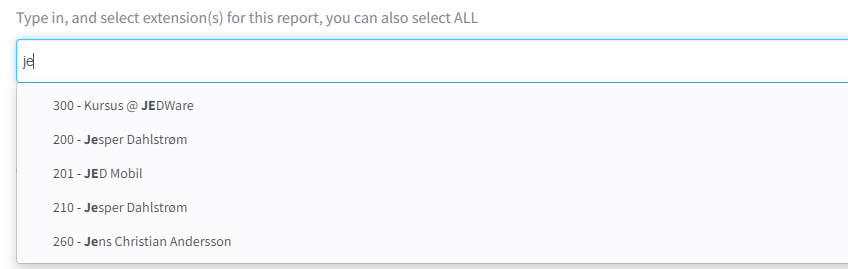
1.) Select the Agents ext. you want in this report (1)
As a start, select the extension numbers or names of the Agents you want to include in this report.
2.) Include in the report, Call types and weekdays (2).
Select the specific settings for your Report selection, eg. only lost Calls, or as in the selection below, all outbound calls and all days.:
3.) You can use our Exclude settings, (3).
Use exclusions, if you don’t want to report calls shorter than xx seconds, or perhaps Calls with a Talktime shorter than xx Seconds. Or if you only want calls from eg. 8-16.
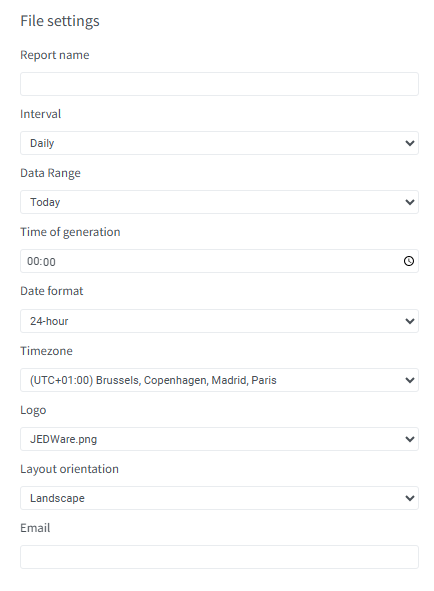
4.) Name and schedule the PDF report, (4).
4a.) Name the report
4b.) Select the Interval for this Report generation:
You can select Hourly, Daily, Weekly, and Monthly
4c.) Select the Data Range of this report,
If you selected Hourly In the above Interval, you can now select Hourly or Extended hourly with start and end time
If you selected Daily In the above Interval, you can now select Today or Yesterday
If you selected Weekly, you now have to select a day for this Report generation
If you selected Monthly you will have to select First or Last day of the Month for this report generation
4d.) Now set a Time for your Report Generation
4e.) Select the Date format,
Please select 24 Hours, or AM/PM Time / Date format.
4f.) Select your timezone
This can be handy if the server is split between different Countries and this report is to be used at a specific timezone. Eg. the Server is placed in Norway, but the user that needs the report is placed in the US, here you can select a US TimeZone, and the report will use the US local timezone for the creation of this Report.
4g.) Select the Logo
4h.) Select the paper direction of the PDF File,
Select between Landscape and Portrait
4i.) Type in the e-Mail of the receiver of this report
Type in the e-mail to which this report is attended, and you can add one or several e-mails for this report (For several, please divide by a comma) We look out for if the email address looks correct and give it a Green Checkmark if it does.
5.) The Help Botton leads you to this document (5).
6.) At last, remember to click the Create Button (6)
Your automatic PDF generation is now scheduled to run. and the report will be e-mailed to you as soon as it has been created.
7.) If you are editing an existing report and regret, please press the Cancel button (7)
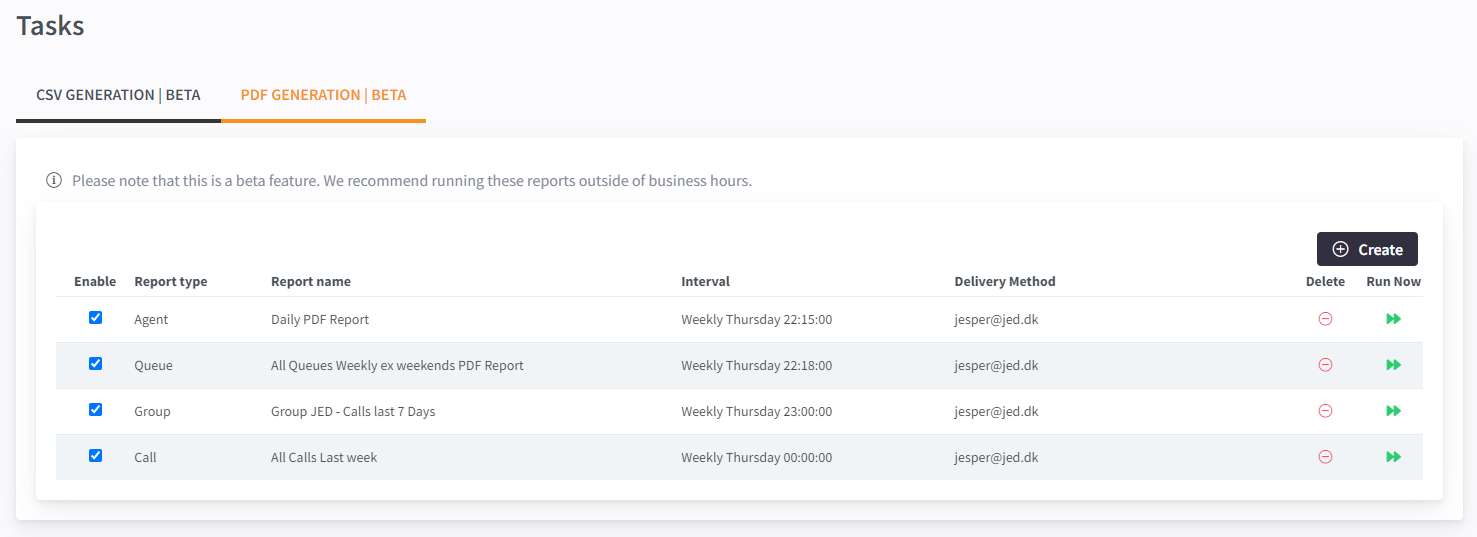
8.) Overview of your Scheduled Reports
In the Tasks, you will find your Scheduled Reports. From here you can Enable / Disable the Schedule, you can edit the Scheduled Report, you can Delete your Schedules Report, and you are able to Run the report “right now”, to check out if your report settings are as expected.