You can invite as many users as you like. Each user gets one role, and the role decides what they can open. Users are managed in Admin settings, Users, which needs a role with the Admin feature.
Before you start
Create the roles first, so you can pick one in the invitation. See User roles.
The username is the email address. The invitation and every password reset go there.
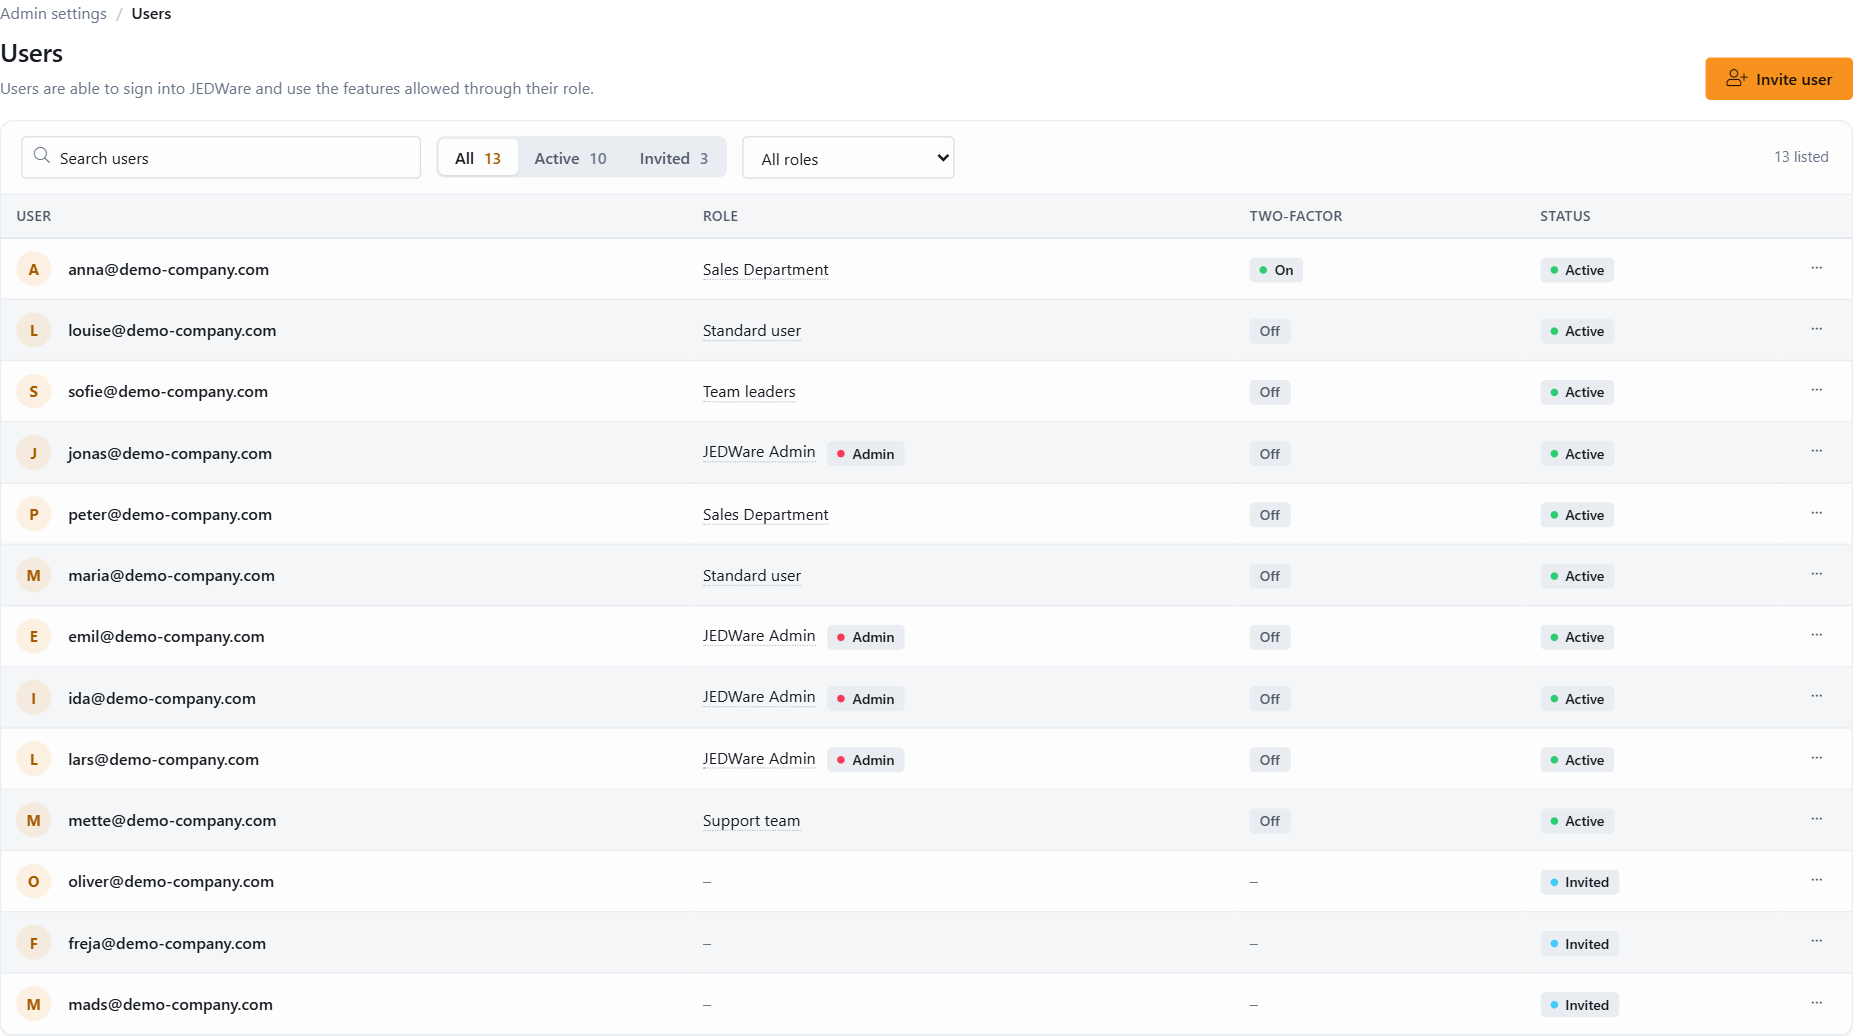
The Users page
The list shows every user with their role, whether two-factor authentication is on, and the status Active or Invited. Search by email, filter by status or role, and use the menu at the end of a row for everything else.
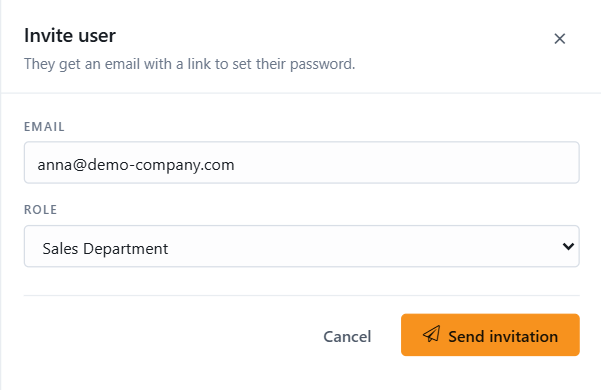
1. Invite a user
Click Invite user.
Type the user’s email address and pick a role.
Click Send invitation.
The user gets an email from [email protected] with a link to a page where they choose their own password. Until they do, they are listed as Invited.
Open the row menu of the invited user and send the invitation again.
Wrong address? Delete the invited user and invite the right one.
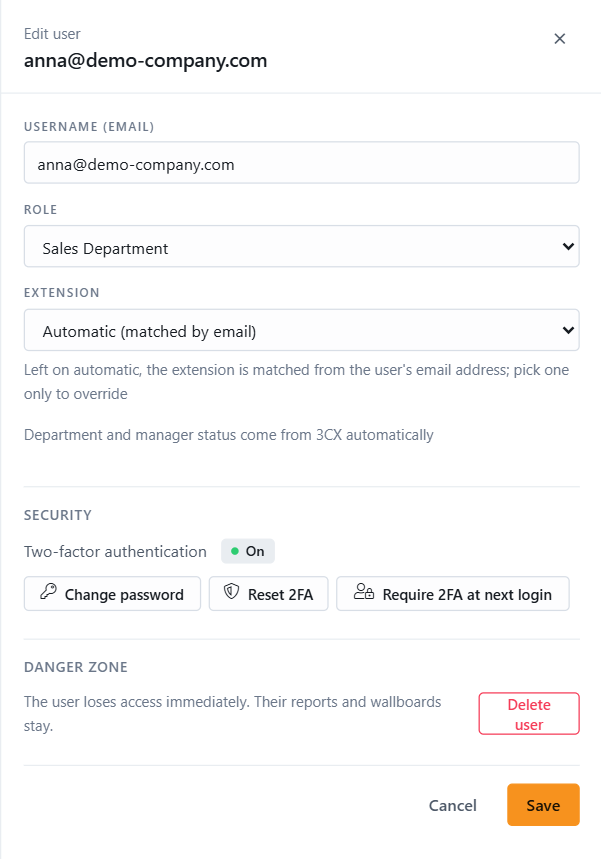
3. Change a user later
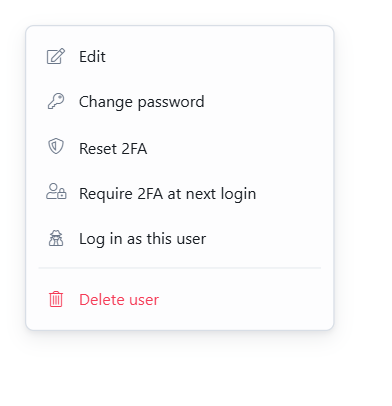
The menu at the end of a row holds the actions:
Edit: change the role, and choose which extension the login is connected to. Automatic matches the email against the extensions in 3CX. See Connecting your login to your extension.
Change password: set a new password for the user.
Reset 2FA and Require 2FA at next login: clear a lost authenticator app, or force the user to set one up at their next login.
Log in as this user: see JEDWare exactly as they do, for support.
Delete user: removes the login. Their call statistics stay.
A changed role takes effect the next time the user logs in.
Not using JEDWare yet?
Reports, dashboards and live wallboards for 3CX. Free 14-day trial, no credit card.