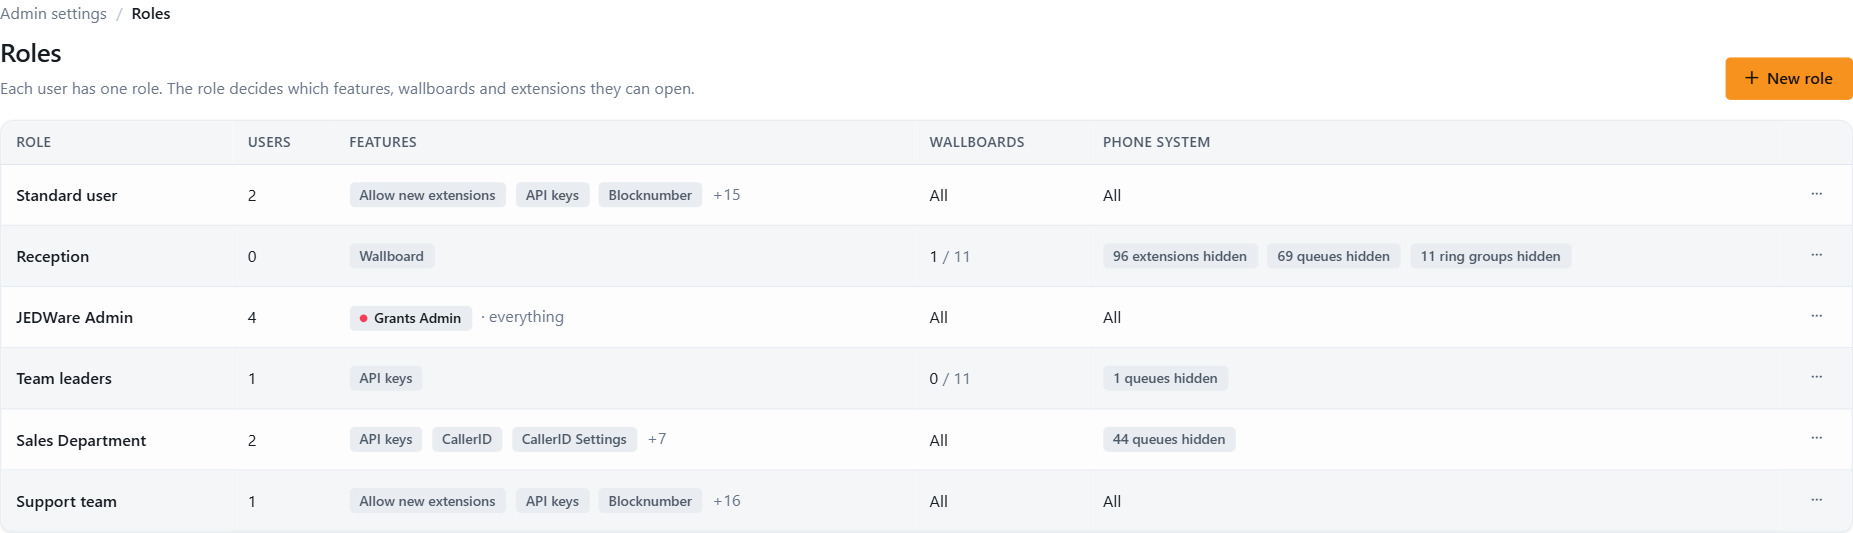
Every JEDWare user has one role, and the role decides what they can open: which features, which wallboards, which extensions, queues and departments. Roles live in Admin settings, Roles. The first user who signed up for your JEDWare got the JEDWare Admin role, which grants everything.
Before you start
Only a role with the Admin feature can open Admin settings and change roles.
Decide the roles you need first. Three usually cover a company: an admin role, a team leader role with reports and wallboards, and an agent role with the wallboard only.
The page lists every role with the number of users, the features it grants, and how many wallboards, extensions, queues and ring groups it can see. The menu at the end of a row opens Edit and Delete role. A role with users cannot be deleted until those users have another role.
1. Create a role and name it
Click New role.
Give the role a name that says who it is for, for example “Sales Department” or “Team leaders”.
Optional: switch on Require two-factor authentication for this role. Members must then set up two-factor authentication at their next login.
2. Pick the features
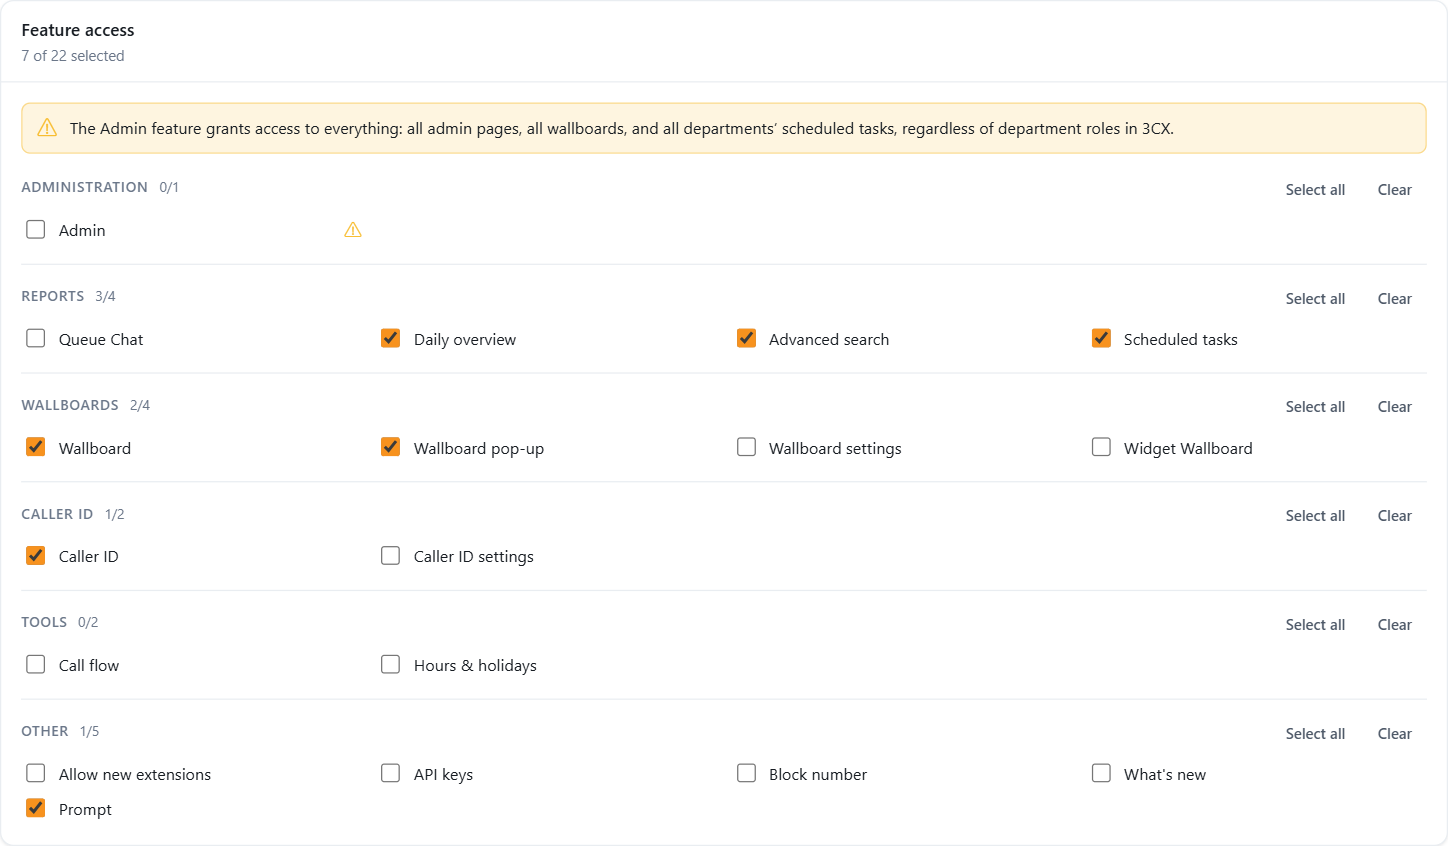
Feature access lists every feature in groups. Tick what the role may open. Select all and Clear work per group.
Administration: Admin grants everything, including all wallboards and every department’s scheduled tasks, regardless of the department roles in 3CX. Give it to as few people as possible.
Reports: Daily overview, Advanced search, Scheduled tasks and Queue Chat.
Wallboards: Wallboard (view), Wallboard pop-up, Wallboard settings (create and change boards) and Widget Wallboard.
Caller ID: change the outbound number, and Caller ID settings for the presets and permissions.
Other: Allow new extensions, API keys, Block number, Prompt and What’s new.
3. Pick wallboards, extensions, queues and departments
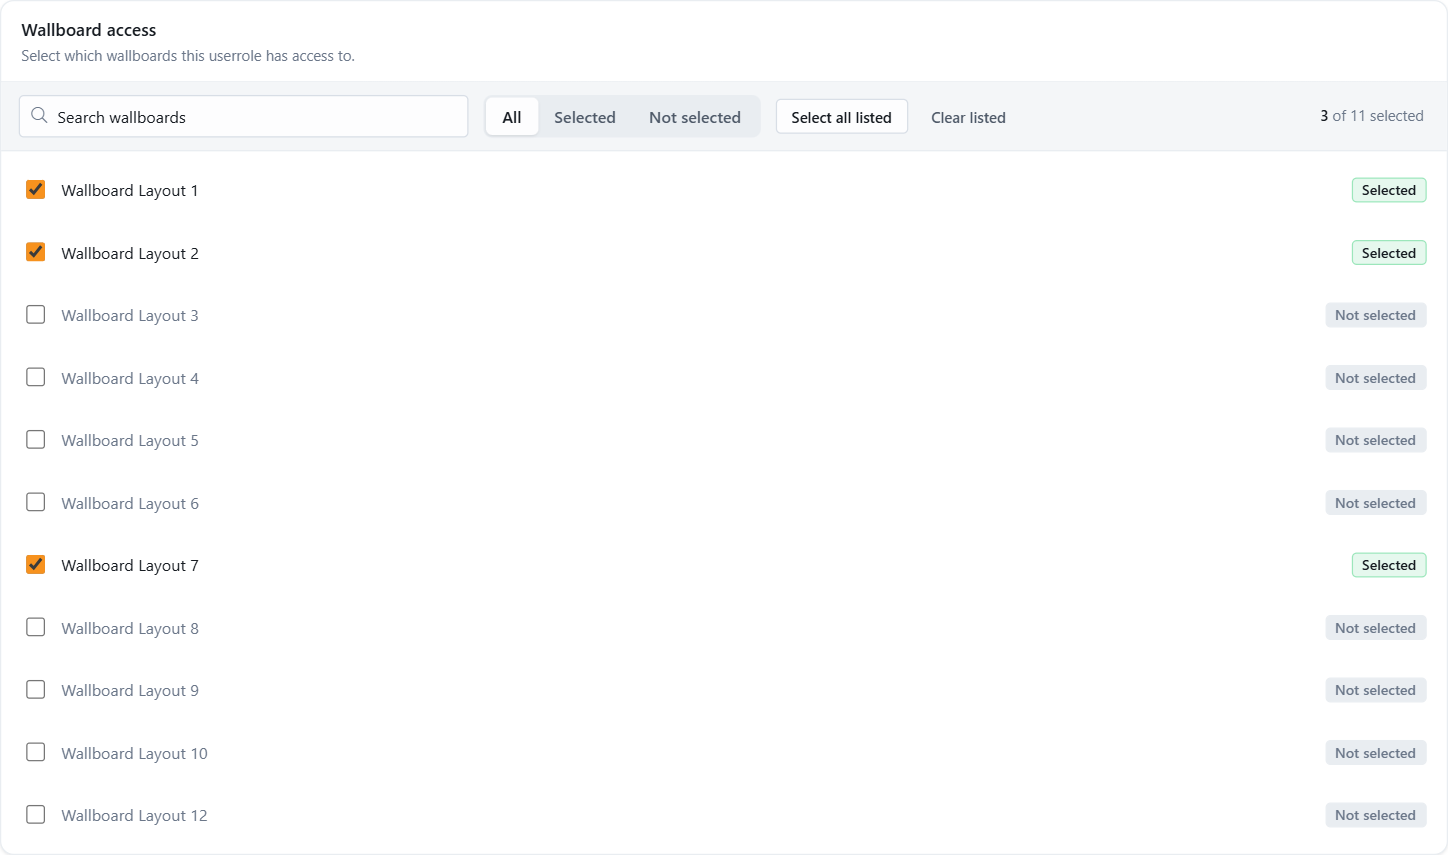
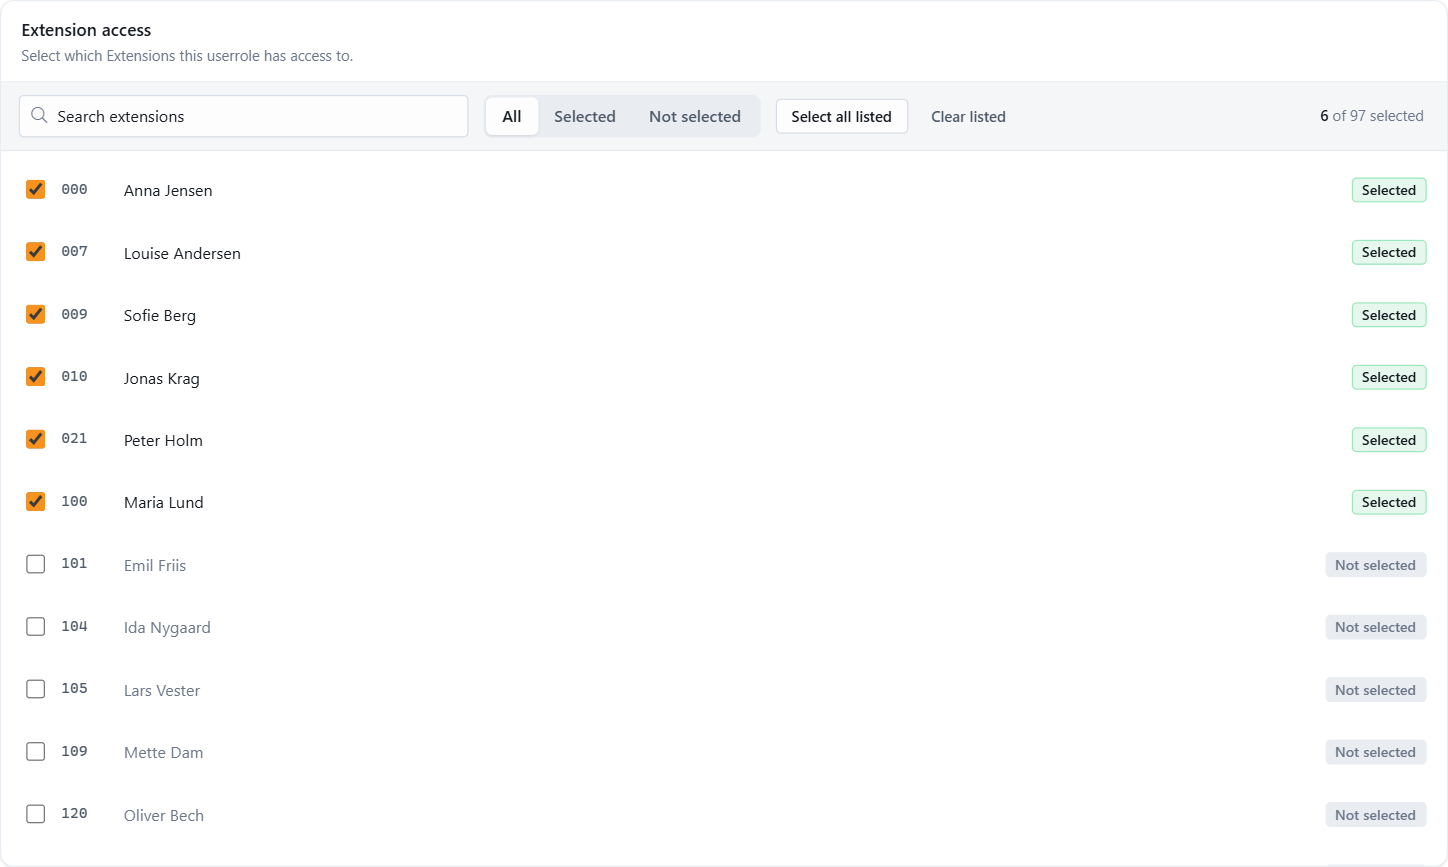
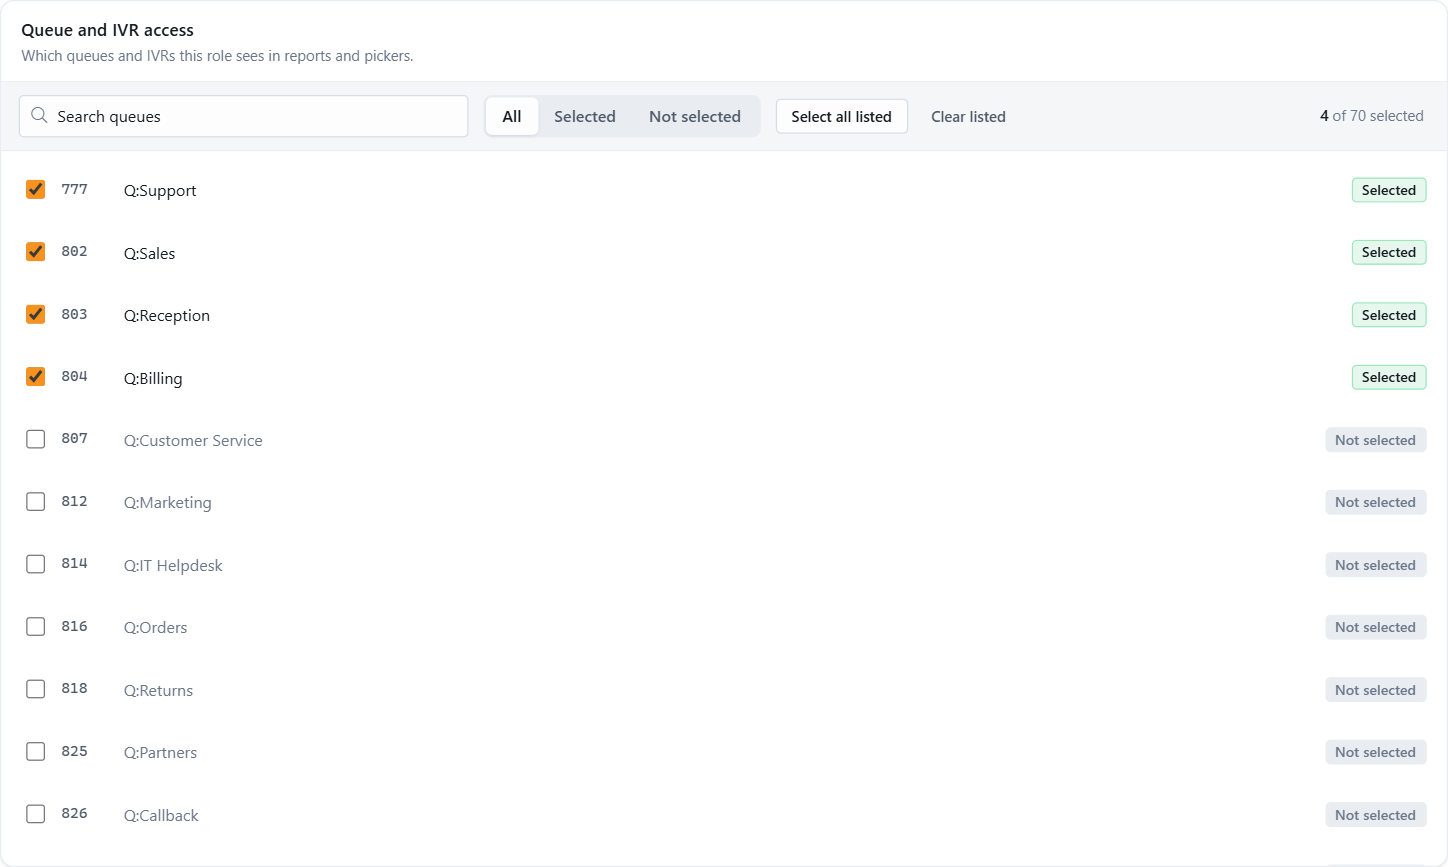
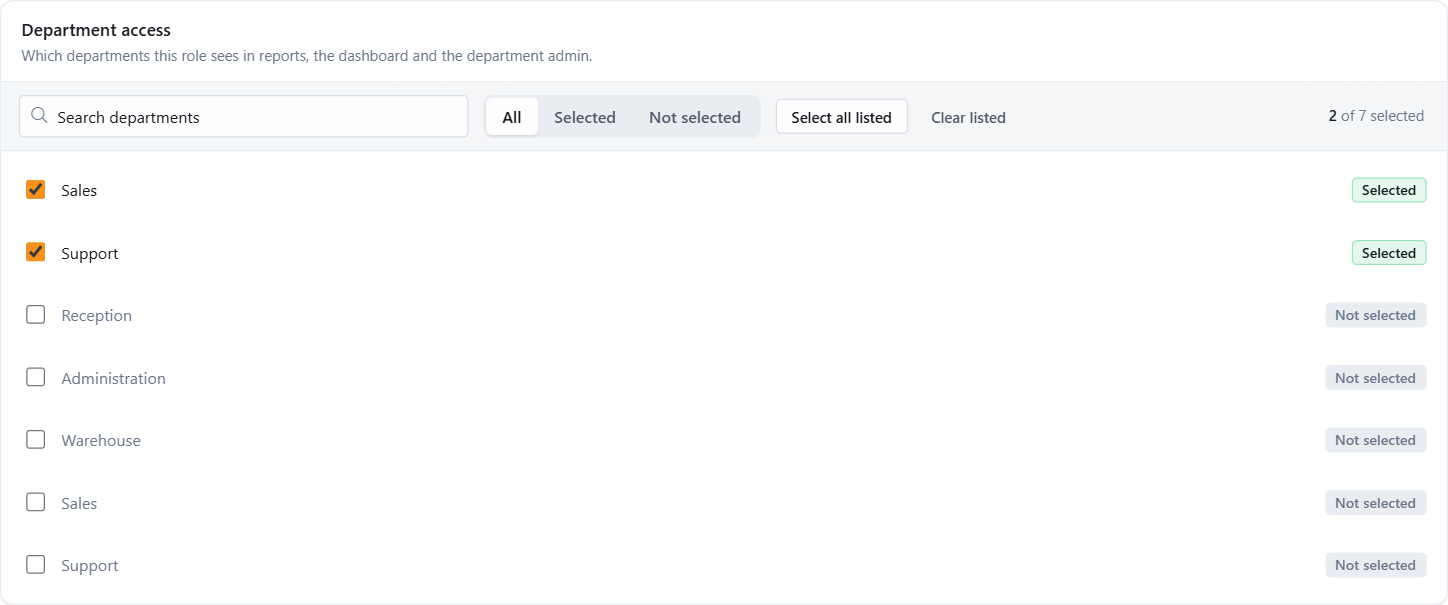
Below the features come one list per thing the role can see. Each list has a search box, the filters All, Selected and Not selected, and Select all listed and Clear listed, which act on the rows that match the search. Tick a row to select it.
Wallboard access: the wallboards the role can open.
Extension access: the extensions the role sees in reports and wallboards. An agent role usually gets the team’s extensions only.
Queue and IVR access and Ring group access: the queues, IVRs and ring groups the role can report on.
Department access: the 3CX departments whose statistics the role can see.
4. Save
The bar at the bottom sums up the selection. Click Create role (or Save on an existing role). The button stays off until the role has a name and at least one feature.
Assign the role to users
Roles do nothing until users have them. Open Admin settings, Users, open the menu at the end of a user’s row and click Edit to pick the role. New users get their role in the invitation. See How to add users to JEDWare.
A changed role takes effect the next time the user logs in. Ask them to log out and back in at app.jed-ware.com.
Not using JEDWare yet?
Reports, dashboards and live wallboards for 3CX. Free 14-day trial, no credit card.