
JEDWare Agent Status Group Report
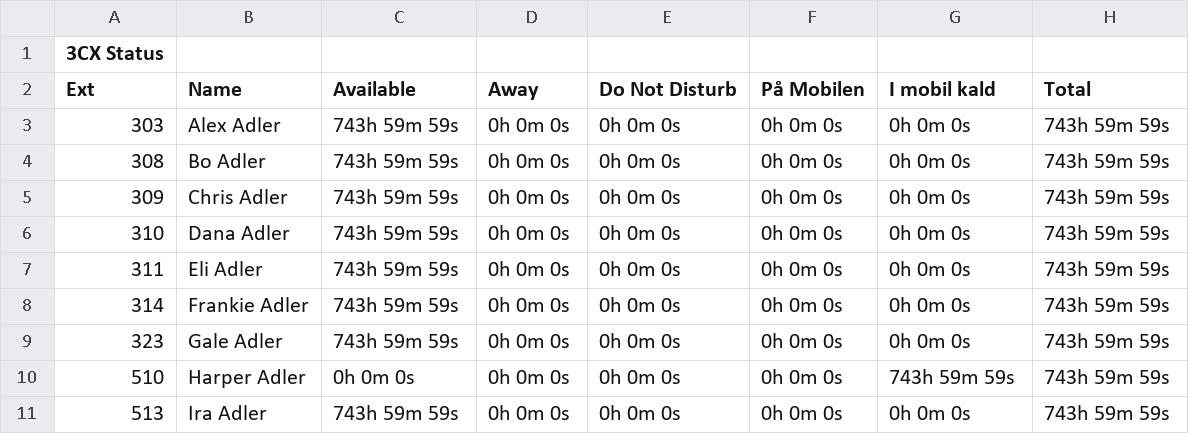
This report will contain: ExtensionId, FullName, Available, Break DND, Custom 1, Custom 2, Total
The CSV end result for a JEDWare Agent Status Group Report, when imported to Excel, will look similar to the one below
What you get: an example of the finished CSV file opened in Excel.
Set up the report
- In the left menu, open Report and click Scheduled tasks.
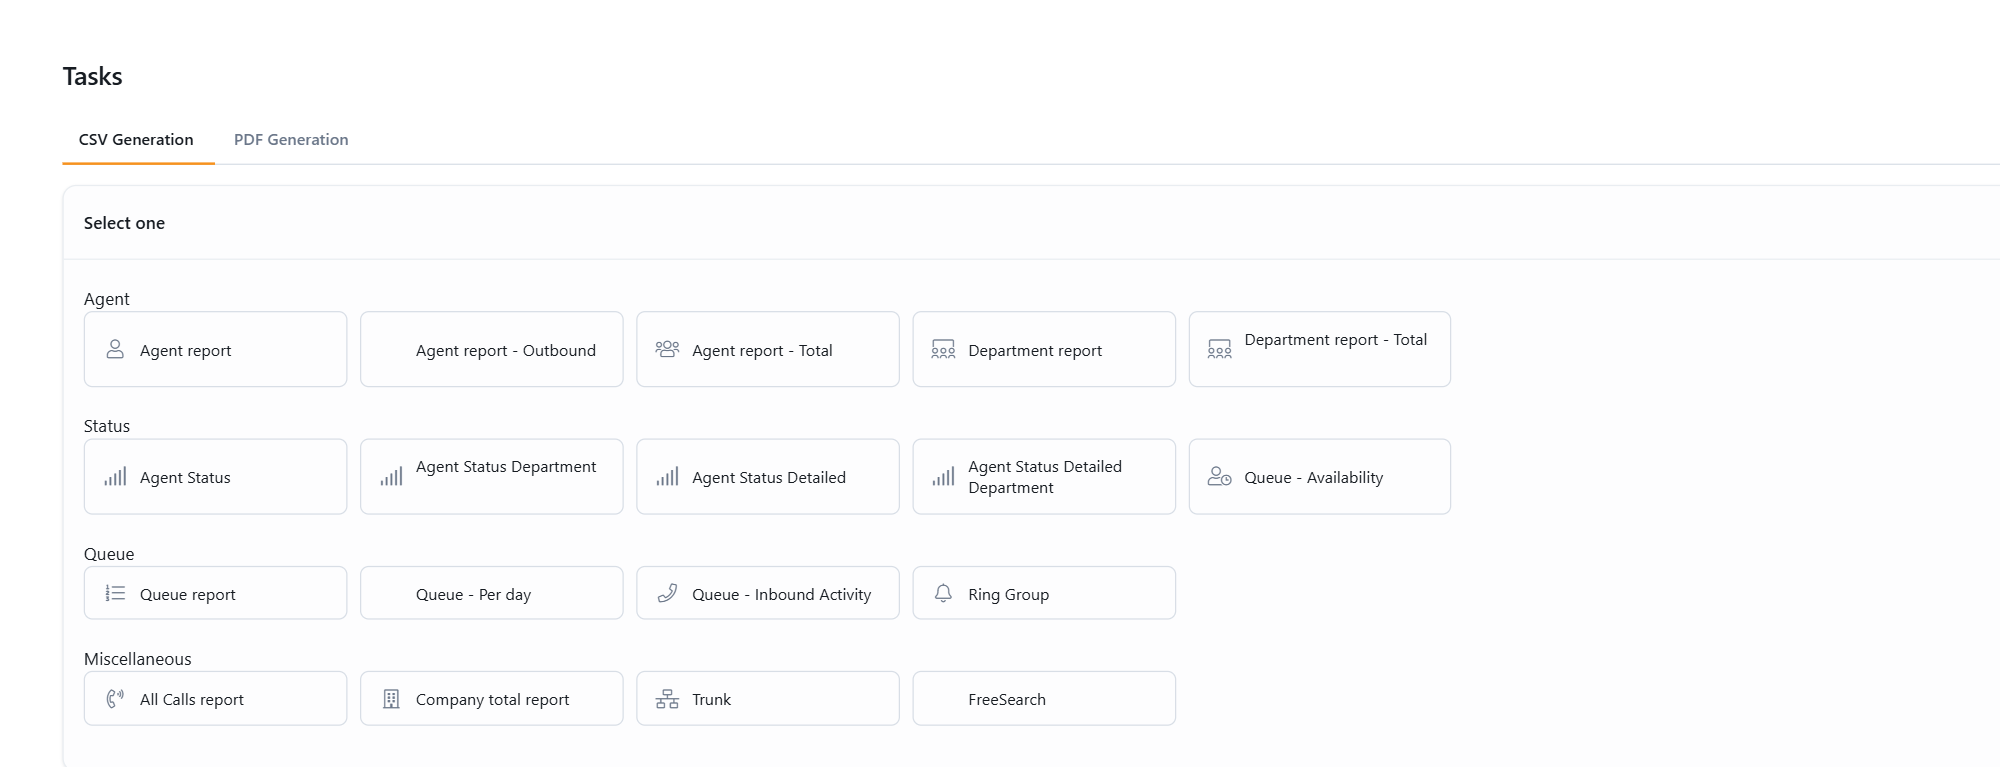
- Choose the CSV Generation tab and click Create CSV in the top right.
- Pick Agent Status Department from the template list.
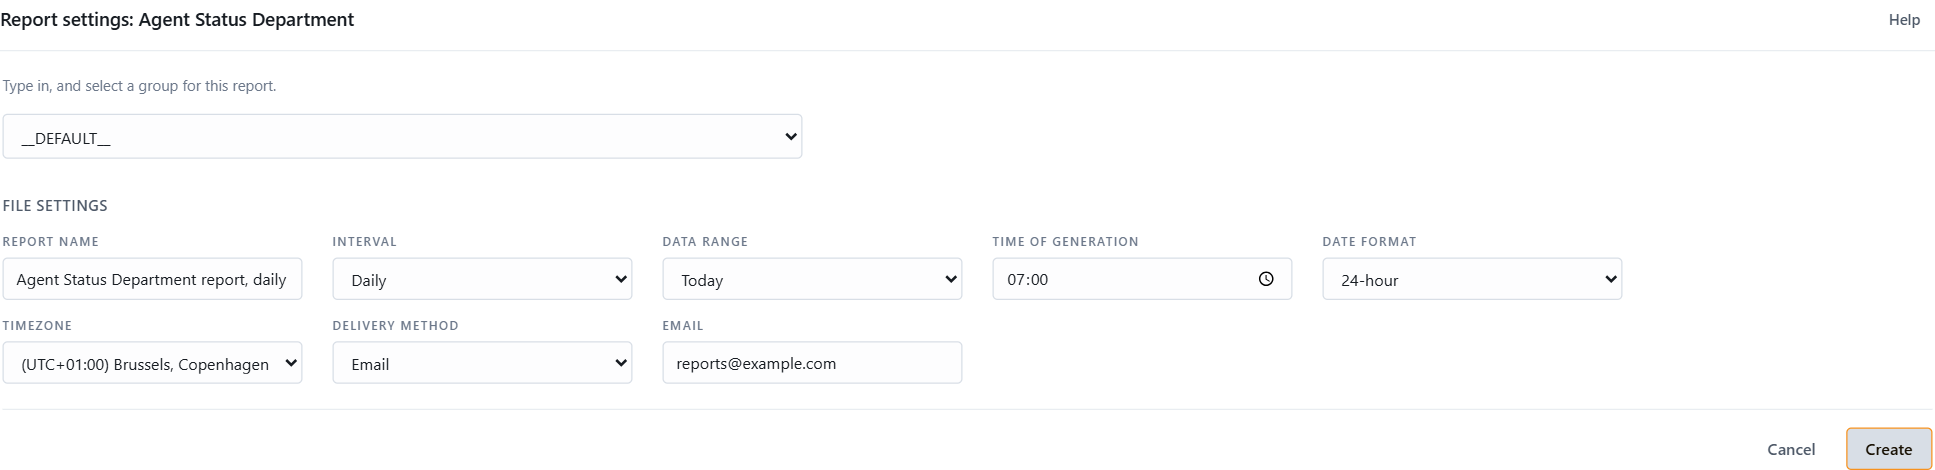
The report settings open. Everything for this report is on one page:
1. Who or what the report covers
Pick the departments the report should cover. Departments come from your 3CX; JEDWare synchronizes them automatically. (This template was called “Group report” in older versions.)
2. File settings
- Report name: your own name for the task. It is shown in the task list and used as the file name.
- Interval: how often the report runs. Hourly, Daily, Weekly or Monthly. Weekly and Monthly ask for the day of generation.
- Data range: which period the report covers, for example Yesterday for a daily report, or a custom range of days.
- Time of generation: the time of day the report is created. Pick a quiet time for the heavy ones; the report asks your 3CX for fresh data when it runs.
- Date format and Timezone: 24-hour or AM/PM, and the timezone the times in the report should be shown in. Useful when the 3CX server and the reader sit in different countries.
- Delivery method: Email sends the CSV file to one or more addresses (separate several with a comma). File saves it in a directory on the 3CX server: on Linux for example
/optgives/opt/callhistory_dd-mm-yyyy.csv, on WindowsC:/CSVfilesgivesC:/CSVfiles/callhistory_dd-mm-yyyy.csv. A green check mark confirms a valid address or path.
3. Included in the report
Tick the call types and columns you want. Everything is included by default; untick what you do not need.
4. Weekdays
Only calls on the ticked weekdays count. Untick Saturday and Sunday for a working-week report.
5. Excluded from the report
Leave out calls that were dropped within a few seconds, calls with a very short talk time, calls outside the hours you specify, or the text header of the file. Use agent-specific data makes the numbers reflect the agent who actually handled the call; see JEDWare philosophy for 3CX reporting.
6. Create
Click Create. The task appears in the list and runs at the next time of generation.
After you click Create
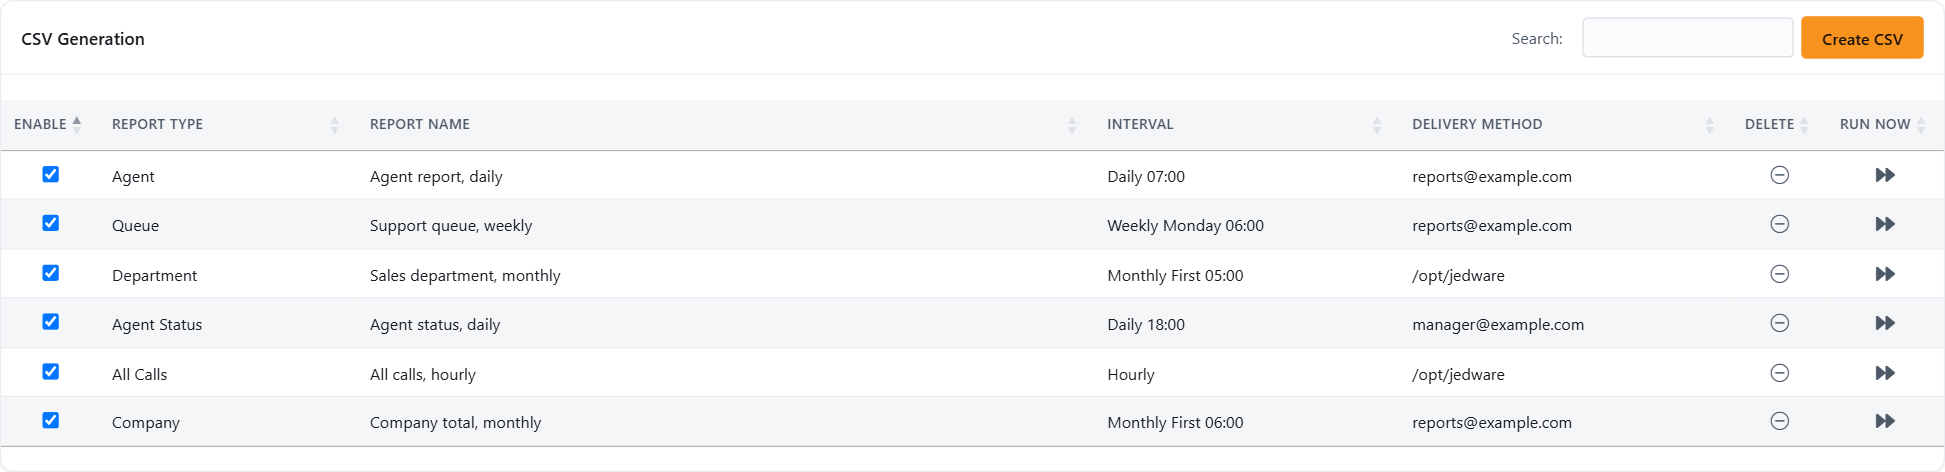
The task list shows every scheduled CSV report. From here you can:
- Enable or disable a task with the checkbox, without deleting it.
- Edit a task by clicking its row.
- Delete a task.
- Run now: creates the report immediately, so you can check the settings before you trust them with a schedule.
Files land in the chosen directory right after the time of generation; emails arrive as soon as the file is created.
Related: all CSV report templates, all PDF report templates, troubleshooting scheduled reports.
New to JEDWare? The 3CX reporting feature page sums up the call flow, the searches and the scheduled reports, with a free 14-day trial.