How to create a wallboard
How to create a wallboard Introduction to easily create Wallboards for your 3CX with JEDWare Get started with JEDWare Wallboards.
Get started with JEDWare Wallboards. This guide will take you through all the necessary steps, for you to create and get the most out of our custom wallboards. Please follow the guide chronological to get the most out of your wallboard.
Or simply check out our video tutorial:
To create a new wallboard, please go to Wallboard → Settings
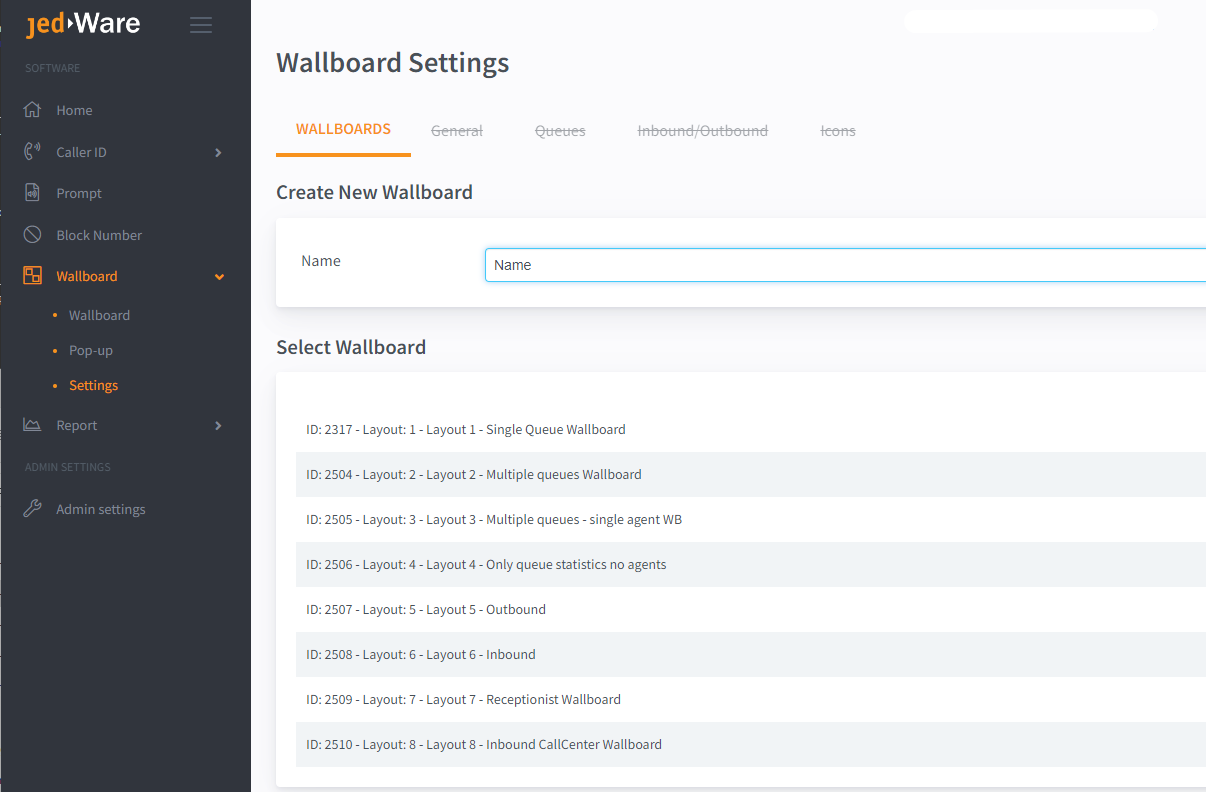
Type in a name for your new wallboard and click Create

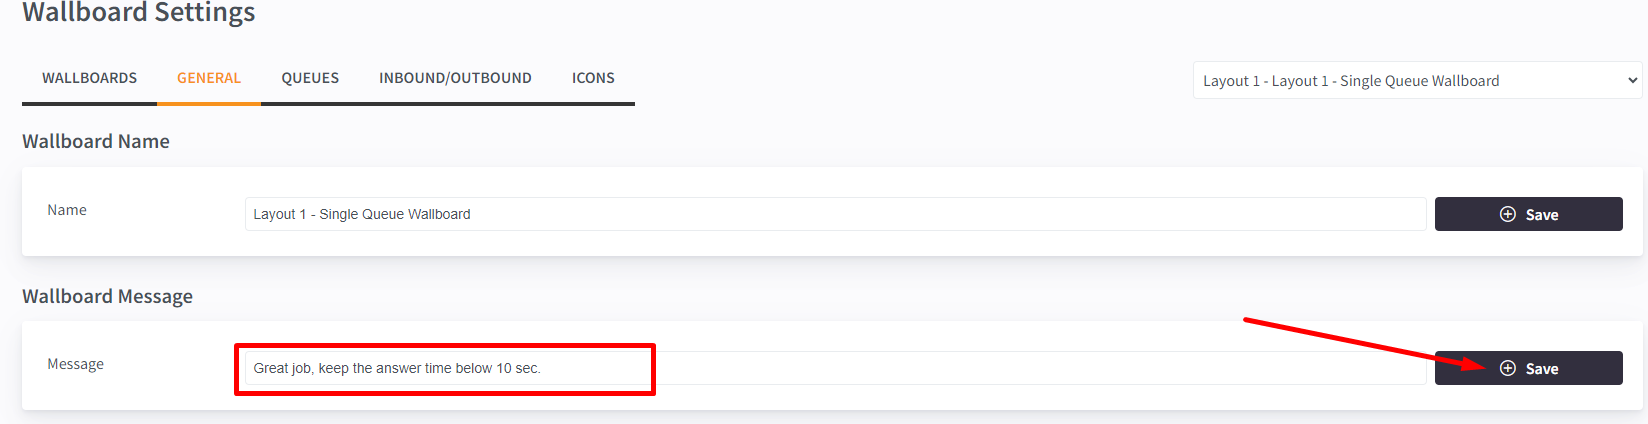
If you choose wallboard layout 1, you can choose to display a customized message on your wallboard. To add this message:
You have the option to choose between eight different layouts. All eight layouts are customizable, but some include features that others do not. You can learn more about each wallboard in the JEDWare Wallboards section in Documentation.

In Wallboard Settings, you have the option to customize rules for your wallboard. E.g. choose the sorting and how your agents will display on your wallboard.

You can choose to hide specific agents or extensions on your wallboard. This can be useful if you e.g. have “dummy extensions”, a SIP strobe light, or just want to exclude specific agents due to company policies.
NOTE: We do not recommend hiding real agents, as this will make it harder to look through wallboard errors, e.g. I know an agent is a part of a queue, but he is not listed on the wallboard, and then our support is going to help you troubleshoot, but as we cannot see your setup on your 3CX Server, it will be time-consuming ping pong – so please hide as few as possible.

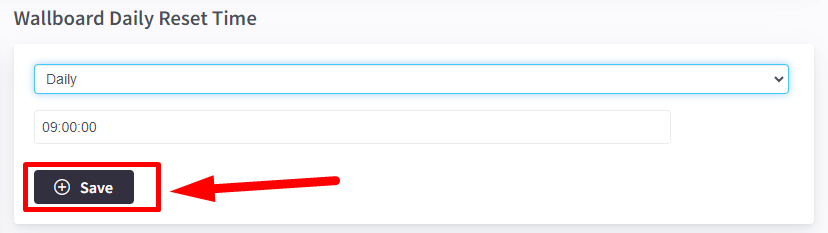
In this dialogue box, you can set the daily reset time. If you e.g. choose 07:00:00, your wallboard will reset its data every day at 7 AM. Please note the time is per 24h; hh:mm:ss.
NEWS From June 2023
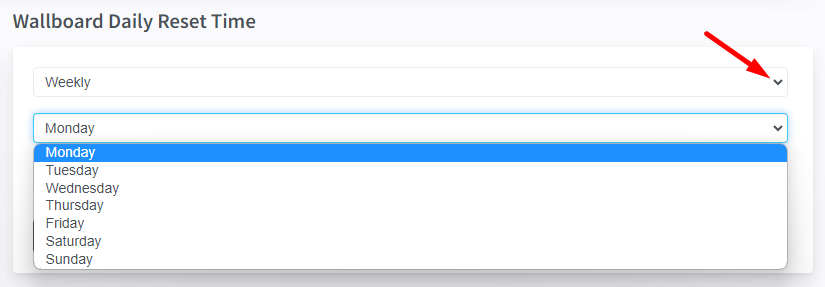
You can now select the Reset time to be Weekly (and you can choose the Day in the week and the time for the reset. You can also choose Monthly reset, this will trigger the reset on the 1. in each month at the time you set here.
You might have made changes during the day, and you don’t think the wallboard look and feels like you expect. In this case, you can trigger a manual reset of the wallboard. We will hereby empty the wallboard settings from our integration, and recreate the settings. Please note that a reset can cause you to lose data from earlier in the day, but the wallboard will start counting correctly after the nightly system reset.

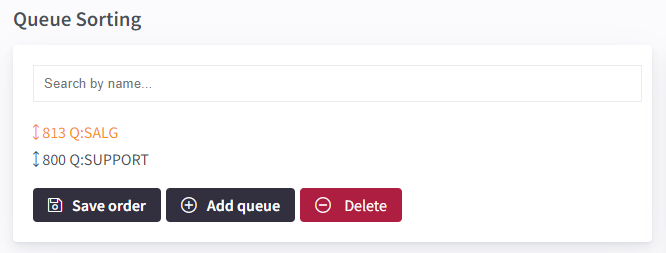
Now you have to choose which queues you want to display on your wallboard. E.g. If your wallboard is for Sales & Support, you might want to choose the queues (813 Sales) and (800 Support).
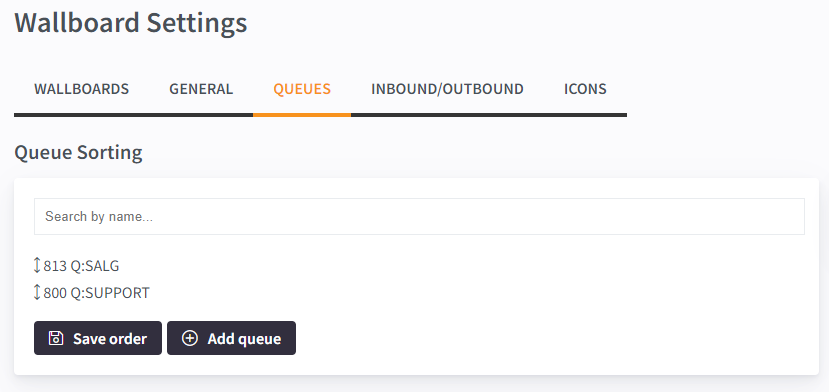
When you add the queues, you will be able to select several Queues at the same time (and you will see which Queues has already been selected – as you cannot select these again). Please note some of the layouts only support one or a few queues.

If you click on your added queue, it will open up the queue settings. In the queue settings, you will find some powerful tools, for example, to change the SLA for each queue.

The outbound tracker is adding all the outbound calls together, using the outbound calls from your selected extensions to track.

You can customize your own agent statuses. You can rename each 3CX agent status and also choose between 32 different icons to attach to the status.
Please notice: You will have to pick the icon first before you rename the status name. This is a known error and will be patched.
Congratulations on setting up your first wallboard! We would ♥ to see it on a big monitor. Maybe on LinkedIn with #JEDWare
Find more Wallboard info in the posts below
How to create a wallboard Introduction to easily create Wallboards for your 3CX with JEDWare Get started with JEDWare Wallboards.
Wallboard Layout 1 – Single Queue Wallboard The Wallboard Layout 1 is built for a single queue. This layout will
Wallboard Layout 2 – Multiple Queues Wallboard This design is for you who want a great overview from 6 to
Wallboard Layout 3, our 4 Queues and multiple extension status Wallboard This design will show extension statuses in color-based boxes
Wallboard Layout 4 – Multiple Queue – NO extension Wallboard Wallboard layout 4. This wallboard will display the statistics of
Wallboard Layout 5 – Outbound Wallboard Wallboard Layout 5 displays outbound statistics for up to 50 agents at a time.
Wallboard Layout 6 – Inbound Wallboard Wallboard Layout 6, Inbound Layout 6 is the “twin wallboard” to Layout 5, but
Wallboard Layout 7 – Traditional Wallboard, with e-Mail function About Wallboard Layout 7 Wallboard Layout 7 is JEDWare’s version of
Wallboard Layout 8 – Inbound Call Center Wallboard About Wallboard Layout 8 Wallboard Layout 8 displays inbound statistics for both
Wallboard Layout 9 – Single Queue with Queue Call-Back updates Description coming soon.
Enable SLA Sound Alerts on the Dashboard In JEDWare you can enable SLA sound alerts for each queue on your
Contact:
JED IT- & Teleservice ApS
Bogensevej 90, DK-5270 Odense N, Denmark
VAT: DK-35653821
Phone +45 70 222 084
e-Mail: [email protected]